Do you want your site to appear under a custom domain instead of the default Binhex.Cloud URL? In this step-by-step tutorial, we'll show you how to link your domain and make your database accessible from [location/website/etc.]. www.yourdomain.com.
Prerequisites
Before you begin, make sure you have:
- A domain registered with any provider (GoDaddy, Namecheap, Cloudflare, etc.).
- Access to your domain provider's DNS panel.
- An active account on Binhex.Cloud with at least one database created.
Step 1: Point to the DNS record
- Log into your registrar's DNS management panel.
- Locate the section to add or edit DNS records.
-
Create a CNAME record with this data:
- Host (Name): www
- Type: CNAME
- Value/Point to: yourdatabase.binhex.cloud.
- TTL: You can leave the default value or 3600 seconds.
💡 If your provider does not allow CNAME records at the “www” level, you could use an ALIAS or ANAME record with the same value.
Step 2: Access the Binhex.Cloud portal
- Go to https://binhex.cloud/my and log in.
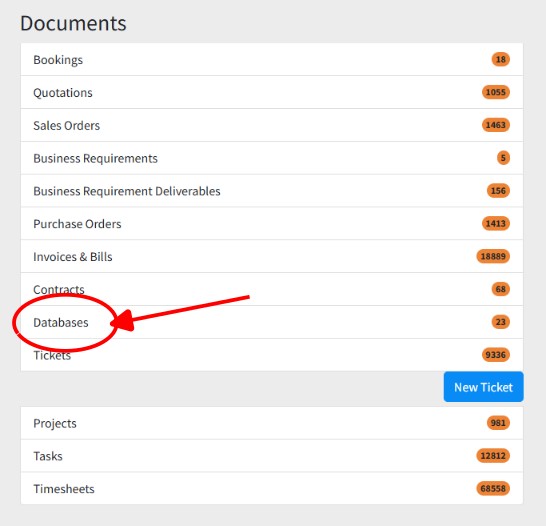
- In the main menu, click on Databases to see the list of your instances.
Step 3: Select the database
- Identify the database you want to expose under your domain.
- Click on the database name to access its details.
Step 4: Add a custom Virtual Host
- Within the details view, find and select the “Virtual Hosts” tab or section.
- Click on “Add Custom Virtual Host”.

Step 5: Add your domain
- In the pop-up window, click on “Add”.
-
In the form, only enter the base domain (without “www”):
Copy
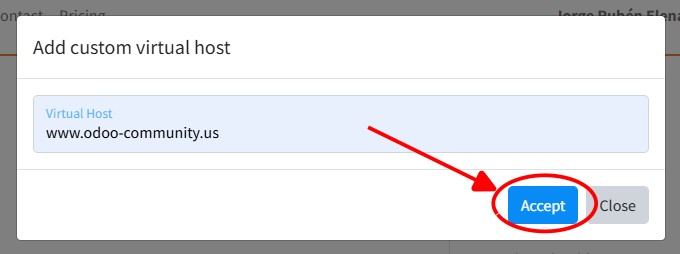
- Press “Accept” to save.
⚠️ Remember that the system will automatically add the version “www.yourdomain.com” for you.
7. Verification and propagation
- DNS changes can take between 5 minutes and 24 hours to fully propagate.
-
To verify this:
- Use tools like whatsmydns.net and verify that www.yourdomain.com points to yourdatabase.binhex.cloud.
- In your browser, visit www.yourdomain.com and check that your application loads.
8. Important Notes
- Order: Always configure the DNS record first before creating the Virtual Host in Binhex.Cloud. If you do it the other way around, the system won't find the domain and you'll get errors.
- SSL/TLS: Binhex.Cloud automatically generates Let's Encrypt certificates for your domain once DNS has propagated.
- Without “www”: If you want your domain to also work without “www” (yourdomain.com), additionally create an A record pointing to the IP address that Binhex.Cloud provides you (contact support if you don't see it in the panel).
9. Done!
With these steps, your database and application will be accessible under your own domain. If you have any questions or encounter errors, first check the DNS propagation and then confirm that you have correctly entered the base domain in the Binhex.Cloud portal.
Do you need help?
Write to us and a team of experts will assist you.
How to set up your own domain on Binhex.Cloud